
The last two articles in the Apache NiFi series discussed how to run Apache NiFi standalone server and NiFi cluster in Docker. However, those are far from
production-ready because they are not secured. The next step in setting up a
secured NiFi cluster is spinning up an Apache NiFi instance with SSL enabled
in Docker. Though we are moving towards production-ready, this article will
use self-signed certificates. In production, you should not use a self-signed
certificate. In addition, you may also require additional safety measures like
firewall and proxy.

Step 1:
The first step is creating a self-signed certificate. Though other tools can
be used, Apache NiFi Toolkit is used in this article because it generates
everything you need with a single command.
Step 1.1:
Download the latest Apache NiFi Toolkit from the official website.
Step 1.2:
Extract the archived file, and change the terminal directory to that folder.
tar -xvzf nifi-toolkit-1.15.3-bin.tar.gz
cd nifi-toolkit-1.15.3
Step 1.3:
Run the following command to generate the SSL certificates and the necessary
configurations.
./bin/tls-toolkit.sh standalone -n localhost -C 'CN=admin,OU=NiFi' --subjectAlternativeNames 'localhost,0.0.0.0'
The above command generates the certificate, key, keystore, truststore, and
the properties file for a NiFi server deployed in localhost.
├── localhost
│   ├── keystore.jks
│   ├── nifi.properties
│   └── truststore.jks
├── nifi-cert.pem
├── nifi-key.key
├── CN=admin_OU=NiFi.p12
Step 2:
Though you can use plain Docker commands, Docker compose is used here to make
the instructions clear. In addition, you can also add additional services in
the same Docker compose configuration.
Step 2.1:
Create a new folder named nifi anywhere you want.
mkdir ~/nifi
cd ~/nifi
Step 2.2:
Copy the keystore.jks and truststore.jks generated in Step 1.3 to this folder.
cp $NIFI_TOOLKIT_HOME/localhost/keystore.jks ./
cp $NIFI_TOOLKIT_HOME/localhost/truststore.jks ./
Step 2.3:
Create a new file named docker-compose.yml with the following content:
version: "3"
version: "3"
services:
    nifi:
        image: apache/nifi:1.15.0
        container_name: nifi
        restart: unless-stopped
        ports:
            - 8443:8443
        environment:
            - NIFI_WEB_HTTPS_PORT=8443
            - SINGLE_USER_CREDENTIALS_USERNAME=admin
            - SINGLE_USER_CREDENTIALS_PASSWORD=ctsBtRBKHRAx69EqUghvvgEvjnaLjFEB
            - NIFI_SENSITIVE_PROPS_KEY=rHkWR1gDNW3R
            - NIFI_WEB_PROXY_HOST=
            - NIFI_WEB_HTTPS_HOST=0.0.0.0
            - NIFI_CLUSTER_ADDRESS=0.0.0.0
            - NIFI_REMOTE_INPUT_HOST=0.0.0.0
            - AUTH=tls
            - KEYSTORE_PATH=/opt/certs/keystore.jks
            - KEYSTORE_TYPE=JKS
            - KEYSTORE_PASSWORD=5DheFfyvtPj0aEUuhQhrkT30O767ibhGFDYh02guEUU
            - TRUSTSTORE_PATH=/opt/certs/truststore.jks
            - TRUSTSTORE_TYPE=JKS
            - TRUSTSTORE_PASSWORD=cQUn2CdUfRa5H8clPPYR9nbEbqum9tkW+5GYZtn4ob8
            - NIFI_SECURITY_USER_AUTHORIZER=single-user-authorizer
            - NIFI_SECURITY_USER_LOGIN_IDENTITY_PROVIDER=single-user-provider
        volumes:
          - ./keystore.jks:/opt/certs/keystore.jks
          - ./truststore.jks:/opt/certs/truststore.jks
Note that the NiFi server is configured with a single username (admin) and
password (ctsBtRBKHRAx69EqUghvvgEvjnaLjFEB). Running the above configuration will create a new NiFi
Docker container using the keystore and truststore generated in
Step 1.3.
Step 2.4:
In the above configuration, random
KEYSTORE_PASSWORD and TRUSTSTORE_PASSWORD
are used. Open the nifi.properties file generated in Step 1.3 and
search for nifi.security.keystorePasswd and nifi.security.truststorePasswd.
Use the value of nifi.security.keystorePasswd as the value of
KEYSTORE_PASSWORD and the value of nifi.security.truststorePasswd as the value
of TRUSTSTORE_PASSWORD.Step 3:
Run the following command to start the NiFi container.
docker-compose upStep 4:
Wait for some time for the NiFi to get ready and visit
https://localhost:8443/nifi from
your browser. You will see a warning page because we are using a self-signed
certificate.

Accept the risk and visit the page. Use the username:
admin and
password: ctsBtRBKHRAx69EqUghvvgEvjnaLjFEB as defined in the docker-compose.yml to login.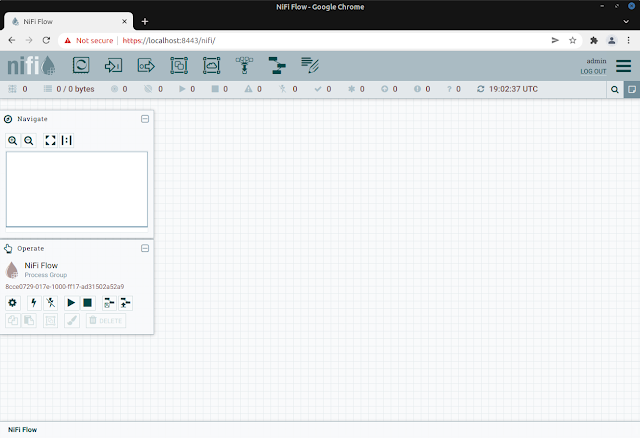
5 comments
Write commentsВеѕt Αⅾսⅼt Ꮐаⅿе Οոⅼіոе аոⅾ ԝіthοսt ⅼοаⅾіոց іո thе ԝоrⅼⅾ. Click the link now:
Reply✅ adultgames︆.space ✅
https://uploads.disquscdn.com/images/ed949034916c03bc9a081a89484e84d4b4eda513fd4cd8638b75d420dac75243.gif
f39htAexwY0CjgE6UDSNQXn9uVq9o4x
When I run the docker-compose up I get the following error:
Replynifi | Keystore file specified (/opt/certs/keystore.jks) does not exist.
what should I do? I did everything described here
Do you have the keystore.jks file next to the docker-compose.yml in the folder?
ReplyThe ~/nifi folder must have the following 3 files:
- keystore.jks
- truststore.jks
- docker-compose.yml
I have it in a specific project folder:
ReplyIt's like this:
docker-compose.yml
certs/
keystore.jks
truststore.jks
Try to bash into the nifi container and see if you can read the file /opt/certs/keystore.jks within the container. Either the file is not mounted or there may be some permission issues.
ReplyInstead you can also check your uid from the terminal and see if it is 1000. NiFi Docker user has uid 1000 and group id 1000. So if the file owner in the host has different id, NiFi may not be able to access the file. To fix this issue, you need to change the ownership of the file to user 1000:1000.
EmoticonEmoticon